Prepare the Pastry Cream (Can be done 24 hours in advance)
In a medium saucepan, whisk together the sugar, cornstarch, and salt.
Gradually whisk in the 2 cups of milk until smooth.
Place the pan over medium heat and cook, stirring constantly, until the mixture thickens and begins to bubble.
In a separate small bowl, lightly beat the egg yolks.
To prevent the eggs from scrambling, perform a "temper": slowly pour about half a cup of the hot milk mixture into the yolks while whisking vigorously.
Once combined, pour the egg mixture back into the main saucepan.
Continue to cook for 2 more minutes, stirring constantly, until the custard is thick and glossy.
Remove from heat and stir in the butter and vanilla extract. Professional Insight: Immediately transfer the custard to a shallow bowl and press plastic wrap directly onto the surface of the cream to prevent a "skin" from forming.
Refrigerate until completely chilled (at least 4 hours).
A wooden spoon lifting a thick, glossy vanilla pastry cream to show the proper ribbon-like consistency.
Bloom the Yeast and Mix the Dough
In the bowl of a stand mixer (or a large mixing bowl), combine the warm milk, sugar, and yeast. Let it sit for 5 to 10 minutes until the mixture looks foamy. Add the melted butter, eggs, and salt. Whisk by hand until combined.
Add 3 cups of the flour.
Using the dough hook attachment (or a sturdy spoon), mix until a shaggy dough forms.
Gradually add the remaining flour, ¼ cup at a time, until the dough clears the sides of the bowl but remains slightly tacky to the touch.
Knead the dough on medium-low speed for 5-7 minutes (or 10 minutes by hand).
The dough should be smooth, elastic, and pass the "windowpane test" (where a small piece can be stretched thin enough to see light through it without tearing).
Place the dough in a lightly greased bowl, cover with a clean kitchen towel, and let rise in a warm, draft-free spot for 1 to 1.5 hours, or until doubled in size.
Punch down the risen dough to release the gas.
Roll it out on a lightly floured surface to about ½-inch thickness.
Use a 3-inch round cutter to stamp out circles. Professional Insight: Avoid twisting the cutter; press straight down and lift. Twisting "seals" the edges of the dough and can prevent a vertical rise during frying.
Place the cut donuts on individual squares of parchment paper on a baking sheet.
This makes it easier to drop them into the oil without deflating them.
Re-roll scraps once, but note those donuts may be slightly less airy.
Cover and let rise for another 45 minutes until they look "puffy" and hold an indentation when gently poked.
Heat 2-3 inches of vegetable oil in a heavy-bottomed pot (like a Dutch oven) until it reaches 360°F (182°C).
Use a clip-on thermometer to monitor the temperature; if the oil is too cool, the donuts will be greasy. If too hot, they will burn on the outside while remaining raw inside.
Carefully lower 2-3 donuts into the oil (with the parchment paper if needed; it will peel right off).
Fry for about 90 seconds per side until deep golden brown. Use a slotted spoon to transfer them to a wire rack set over paper towels.
Let cool completely before filling.
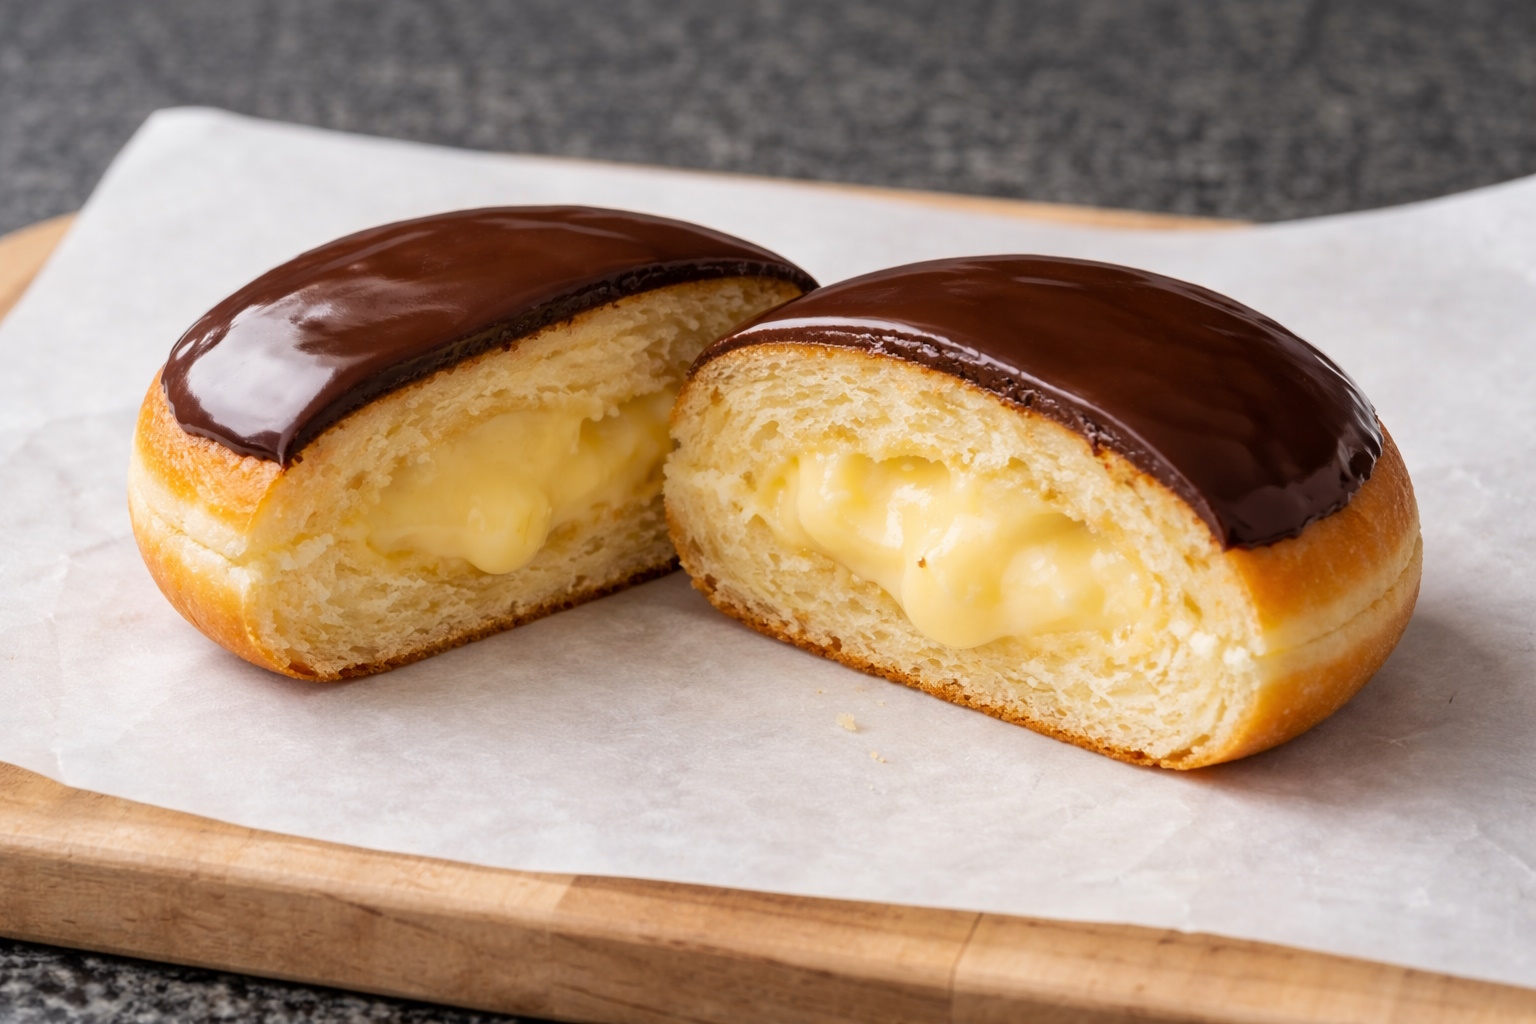
Once the donuts are cool, use a small knife or a Bismarck tip to poke a hole in the side of each donut.
Give the chilled pastry cream a quick whisk to loosen it, then transfer it to a piping bag.
Pipe the cream into each donut until you feel the weight increase and the donut expands slightly.
For the glaze, heat the heavy cream in the microwave until it begins to simmer.
Pour it over the chocolate chips and corn syrup. Let sit for 5 minutes, then whisk until smooth.
Dip the top of each filled donut into the warm glaze.
Set back on the rack for the glaze to firm up.