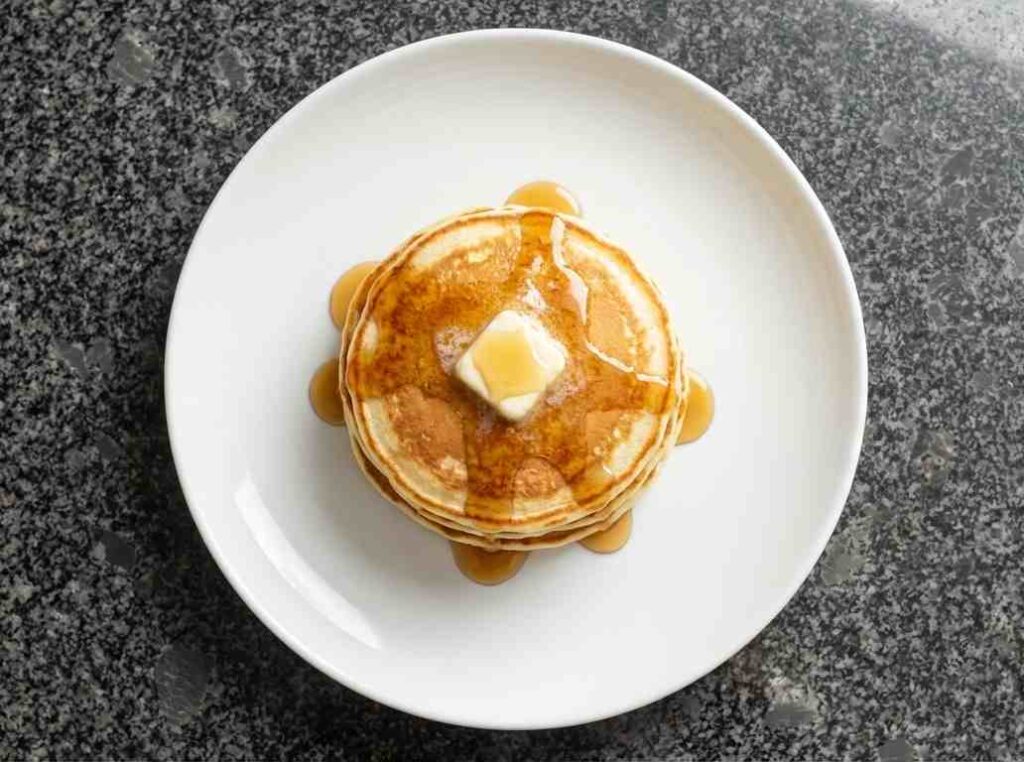
The Science of the “Lift” (The Why)
The “fluffiness” we crave is a result of three primary scientific pillars: The pH Pivot, Gluten Inhibition, and Thermal Conductivity.
1. The pH Pivot (Leavening Science):
Pancakes rely on a precise acid-base reaction. While baking powder provides a steady release of carbon dioxide (CO2) when moistened and heated, it often isn’t enough to create significant height on its own. By introducing an acid—specifically buttermilk—we initiate an immediate reaction with baking soda. This alkaline counterpart reacts with the lactic acid in the milk to create an instantaneous burst of CO2 bubbles. **Professional Insight:** If your batter is too alkaline, you will notice a soapy aftertaste and excessive browning. A slightly acidic batter ensures a clean flavor and a tender crumb.
2. Hydration and Gluten Inhibition:
Texture is determined by protein. When wheat flour meets liquid, two proteins (gliadin and glutenin) bond to form gluten. While gluten is essential for the structure of chewy bread, it is the enemy of a fluffy pancake. Over-mixing the batter creates a tough, elastic network that traps air too tightly, resulting in a “rubbery” bite. By using the “muffin method”—mixing dry and wet ingredients until just combined—we limit this development. The fats in the recipe, such as melted butter, perform “shortening,” which physically coats the flour proteins to inhibit long-chain gluten formation.
3. Thermal Conductivity:
The pan’s material and temperature dictate the “lift.” When the batter hits a surface at approximately 375°F (190°C), the exterior sets quickly through the Maillard reaction (the browning of sugars and amino acids). This creates a structural “shell.” As the internal temperature rises, the steam and CO2 expand upward, pushing against this shell to create height rather than spreading outward.
—
Safety & Disclaimer Section
**Food Safety Warnings:**
* **Raw Flour Hazard:** Flour is a raw agricultural product and has not been treated to kill germs like E. coli. Never taste or consume raw pancake batter.
* **Salmonella Risk:** This recipe contains raw eggs. To ensure safety, pancakes must be cooked to an internal temperature of 160°F (71°C).
* **Allergen Alert:** This recipe contains Wheat, Milk, and Eggs (three of the “Big 9” allergens).
**Legal Disclaimers:**
* **Burn Hazard:** Griddles and skillets reach high temperatures. Ensure pan handles are turned inward and children are supervised during the cooking process.
* **Equipment Disclaimer:** Cooking times and results may vary based on your altitude, local humidity, and the heat source used (gas, electric, or induction).
* **Health Disclaimer:** This guide is for educational and culinary purposes and does not replace professional dietary or nutritional advice.
—
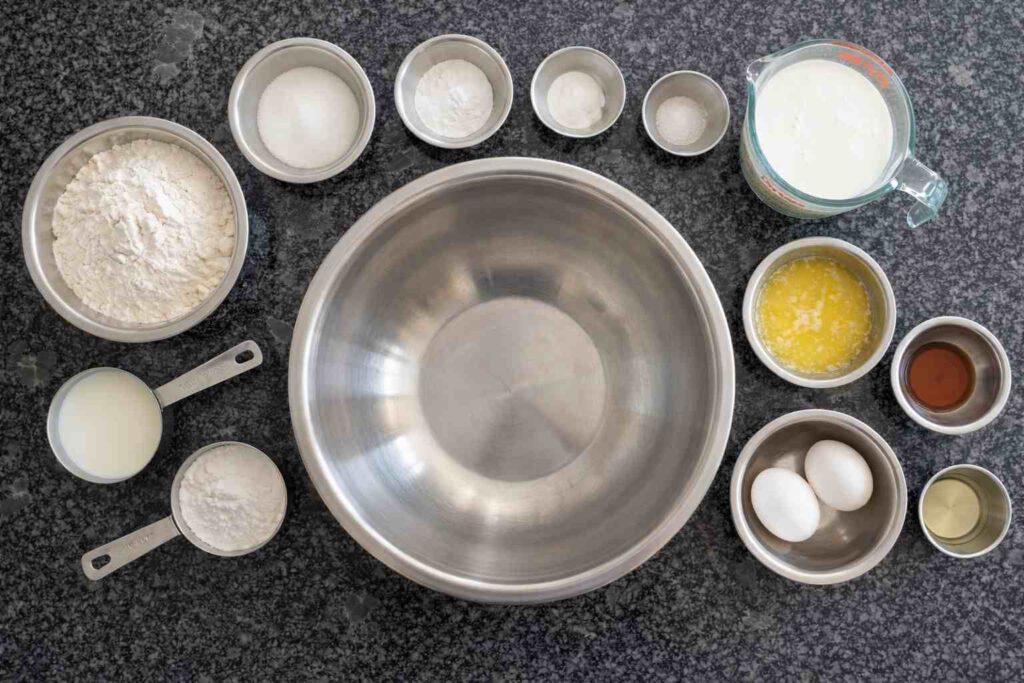
Ingredients (Standard Pantry List)
* 2 cups (~250g) All-purpose flour
* 3 tablespoons (40g) Granulated sugar
* 2 teaspoons (10g) Baking powder
* 1 teaspoon (~5g) Baking soda
* 1/2 teaspoon Salt
* 2 cups Buttermilk (or 2 cups milk mixed with 2 tablespoons white vinegar, rested for 5 minutes)
* 1/4 cup Unsalted butter, melted and slightly cooled
* 2 Large eggs
* 1 teaspoon (5g) Vanilla extract
* 1 tablespoon (5g) Vegetable oil (for the pan)
—
### Instructions: The Hyper-Detailed Method
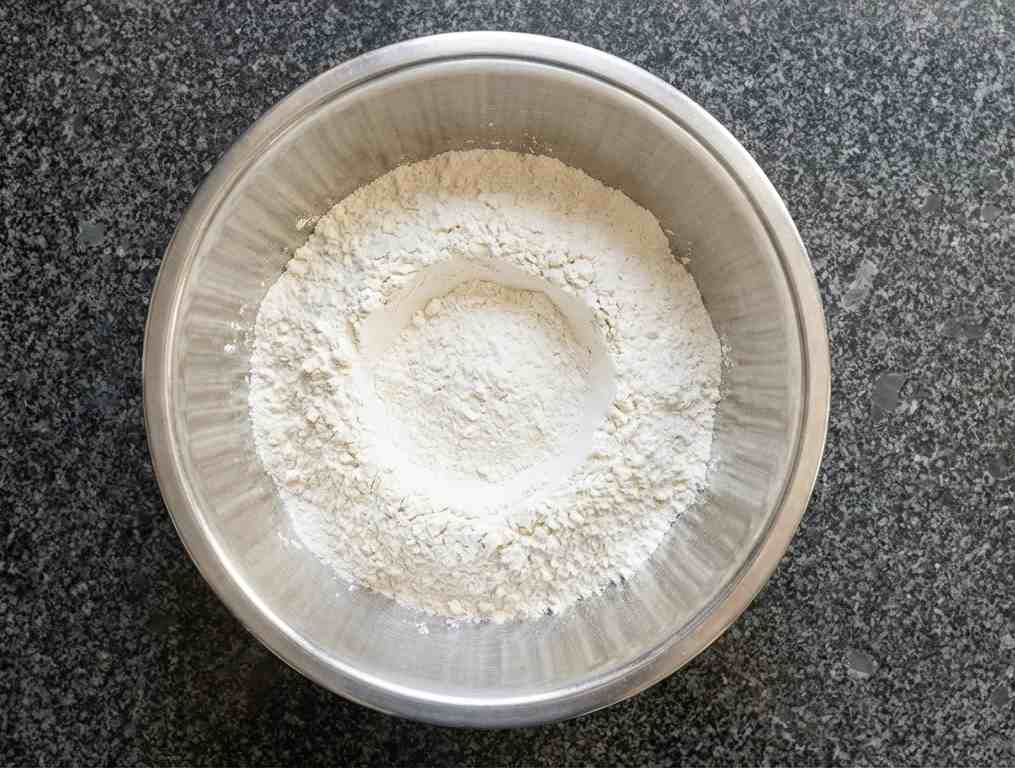
Step 1: Preparing the Dry Foundation
In a large mixing bowl, whisk together the all-purpose flour, granulated sugar, baking powder, baking soda, and salt. Use a vigorous whisking motion for about 30 seconds. This does more than combine ingredients; it aerates the flour and ensures the leavening agents are evenly distributed. **Professional Insight:** Sifting the flour is not strictly necessary for this recipe, but if your flour is clumped, sifting will prevent over-mixing later.
Step 2: The Wet Emulsion
In a separate medium bowl, whisk the eggs until the yolks and whites are fully integrated. Slowly pour in the buttermilk and vanilla extract, whisking until smooth. Finally, stream in the melted unsalted butter. By adding the butter to the liquid ingredients first, you ensure it is evenly distributed before it hits the flour.
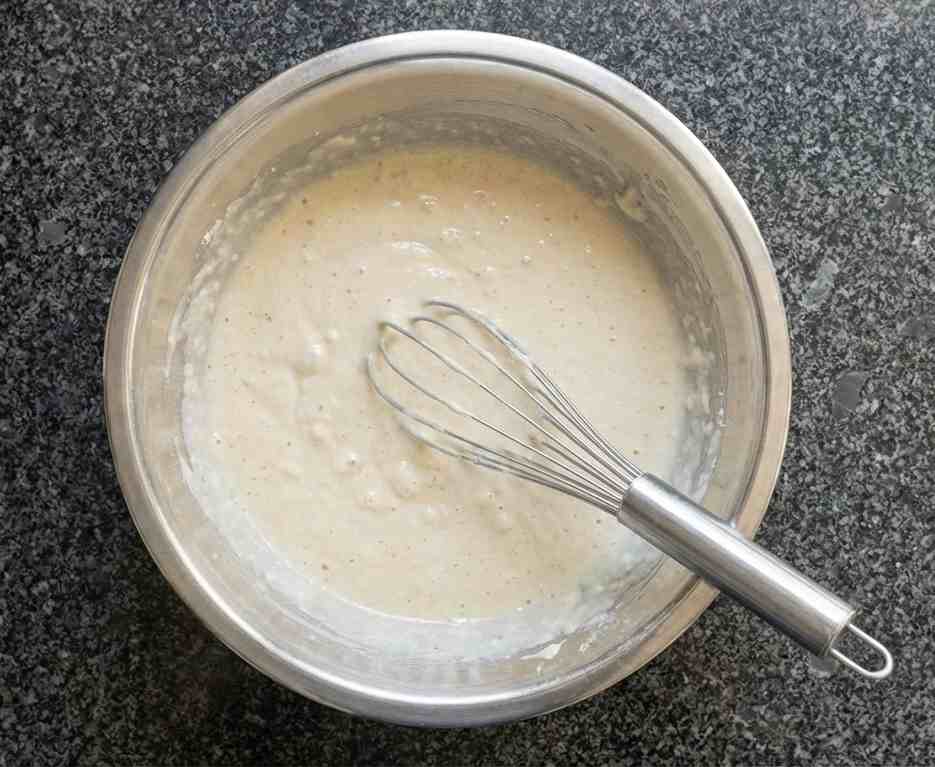
Step 3: The Critical Combine
Make a “well” in the center of the dry ingredients. Pour the wet mixture into the well. Using a large silicone spatula, gently fold the mixture together. Stop mixing the moment you no longer see large streaks of dry flour. The batter should be thick and significantly lumpy. **Professional Insight:** If you mix until the batter is smooth, you have developed too much gluten, and your pancakes will be tough. Lumps are essential for height.
Step 4: The Rest Period
Allow the batter to sit undisturbed for 10 to 15 minutes at room temperature. During this time, the flour proteins fully hydrate, and the baking soda begins its initial reaction with the buttermilk. You will notice small bubbles forming on the surface of the batter; this is the “lift” beginning to happen.
Step 5: Surface Calibration
Place a non-stick skillet or cast-iron griddle over medium heat. To test the temperature, drop a few droplets of water onto the surface. If they dance and sizzle before evaporating, the pan is ready. Lightly coat the surface with vegetable oil or a small amount of butter, wiping away any excess with a paper towel. A “dry” but greased pan produces the most even browning.
Step 6: The Pour and the Bubble Watch
Using a 1/4 cup measuring cup, scoop the batter onto the hot griddle. Do not crowd the pan; cook only 2 or 3 at a time. Watch the surface of the pancake carefully. You are looking for two specific cues:
1. Small bubbles will form and begin to pop, leaving tiny holes that do not immediately fill back in with batter.
2. The edges of the pancake will look matte and “set” rather than shiny and wet.
This usually takes 2 to 3 minutes.
Step 7: The Flip
Slide a thin, wide spatula under the pancake. Using a quick motion of the wrist, flip the pancake over. **Professional Insight:** Do not flip the pancake from a great height, as this will collapse the air bubbles you’ve worked so hard to create. A gentle, low flip is best. Cook the second side for another 1 to 2 minutes until golden brown.
Step 8: The Holding Pattern
If cooking for a crowd, do not stack the finished pancakes immediately, as the steam will make them soggy. Instead, place them in a single layer on a wire rack set over a baking sheet in a 200°F (95°C) oven until ready to serve. This maintains the crisp exterior and fluffy interior.
—
### Notes, Swaps, and Troubleshooting
**The “No Buttermilk” Workaround:**
If you do not have buttermilk in the fridge, you can create a “sour milk” substitute. Mix 2 cups of whole or 2% milk with 2 tablespoons of white vinegar or lemon juice. Let it sit for 5 to 10 minutes until it looks slightly curdled. This provides the necessary acid to react with the baking soda.
**Troubleshooting Flat Pancakes:**
* **Expired Leavening:** Baking powder and soda lose their potency over time. Test your baking powder by putting a teaspoon in hot water; if it bubbles vigorously, it’s good.
* **Over-mixing:** If your batter looks like a smooth crepe batter, you’ve gone too far.
* **Heat Too Low:** If the pan isn’t hot enough, the CO2 will escape before the structure of the pancake can “set,” leading to a flat result.
**Storage and Freezing:**
Pancakes are excellent for meal prep. Allow them to cool completely on a wire rack. Place them in a single layer on a baking sheet and freeze for 1 hour. Once firm, transfer them to a freezer-safe bag. To reheat, simply pop them in a toaster or a 350°F oven for 5 minutes. This preserves the texture much better than a microwave.
For best flavor, use high-quality or organic ingredients where possible.